To change your router’s default WiFi password, follow this simple step-by-step guide. You can easily update WiFi password through the router’s admin dashboard using the steps below.
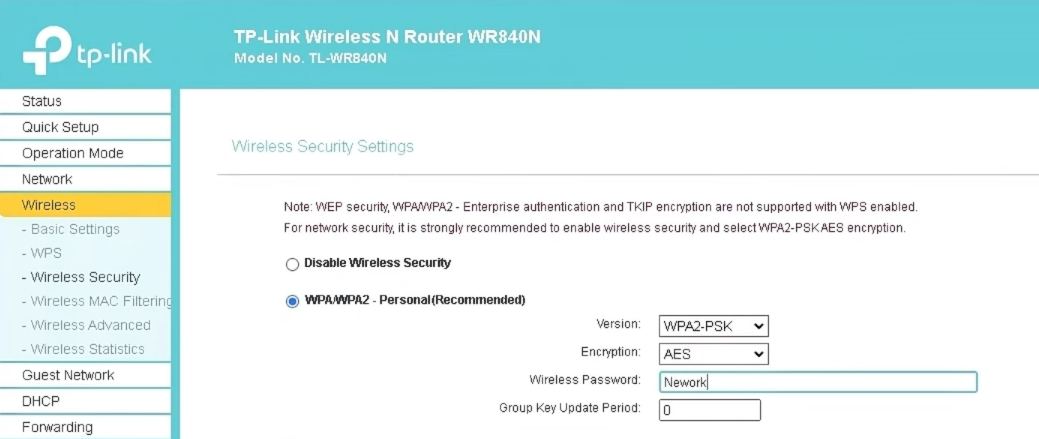
TP-Link:
- Open your web browser and type 192.168.0.1 in the address bar (or try 192.168.1.1 if that doesn’t work)
- Enter your login details – usually admin for default username and password
- Click on Wireless > Wireless Security > WPA/WPA2 – Personal (it’s the most secure option)

- Find the Password field and type your new WiFi password
- Click Save to apply the change.
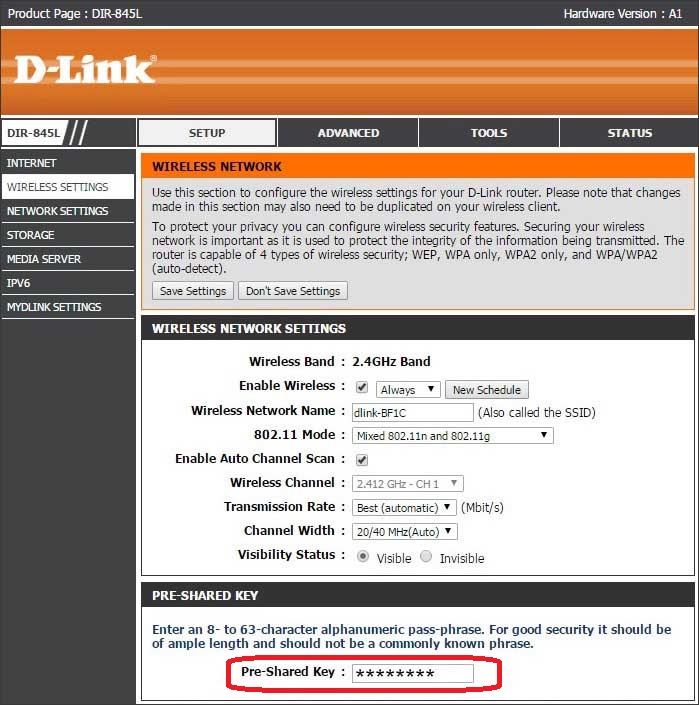
D-Link:
- Open your web browser and type 192.168.0.1 in your browser (or http://dlinkrouter.local for some models)
- Log in with your admin password (Most D-Link routers have a default user name of admin and password of admin/blank)
- Navigate to Wireless > Wireless Settings

- Enter your new password in the Pre-Shared Key field
- Click Apply and let the router reboot
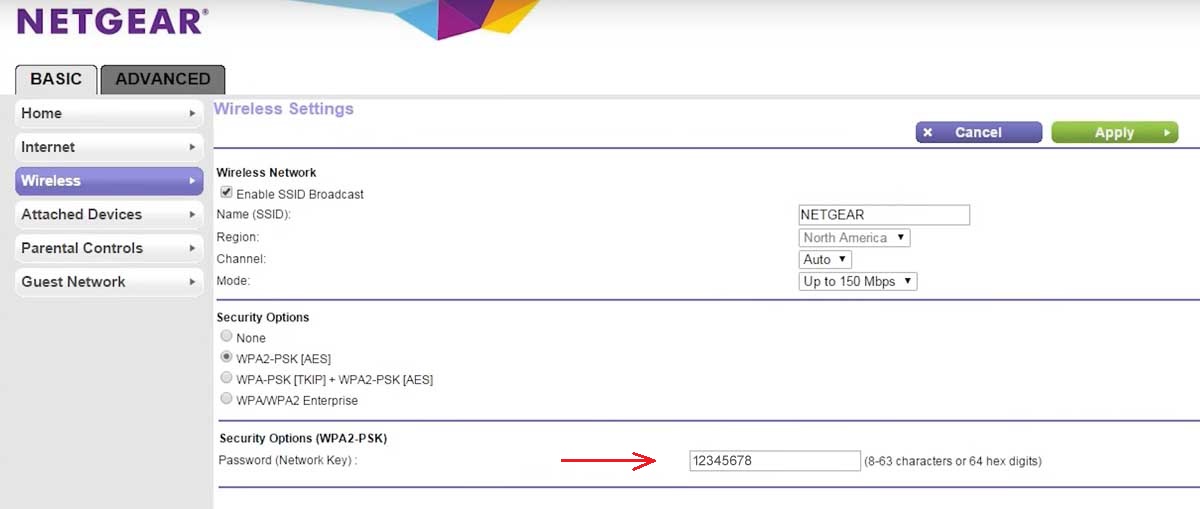
NETGEAR:
- Type 192.168.1.1 or routerlogin.net in your browser
- Enter your admin username and password (often “admin” and “password”)
- Go to Wireless > Security Options > Select WPA2-PSK [AES] for the best security

- Type your new password in the Password (Network Key) box
- Click Apply and wait for the restart